How to build Apple's image sequence
Chances are, you're familiar with Apple's captivating website animations, even if you're not an Apple fan 😏. In this article, we'll dive into the implementation of the Apple-like Image Sequence scroll animation using Svelte and React.

Scroll-bound animations have been around for quite some time, but they can be laborious to orchestrate. That's why most developers rely on plugins or libraries to handle them, and rightly so. However, if you enjoy a challenge like I do, you might be interested in implementing this animation from scratch.
I've provided two versions for you to explore: a Svelte implementation and a React implementation. Click on the link for your preferred option or continue reading for a more detailed explanation. Let's get started! 😀
What we need
Let's take a closer look at Apple's website and use browser developer tools to reverse engineer their Image Sequence scroll animation.
When inspecting the HTML markup, we find an interesting element:
<canvas width="1004" height="1214"></canvas>
It's a canvas element! Your mind races with possibilities. Could it be loading a 3D model? 🤯
However, upon closer examination, we notice that they have loaded images and prepared for different breakpoints.
Responsiveness
For the purpose of this article, we won't delve into the challenge of loading different-sized images in different breakpoints, but it's an interesting aspect to explore later. 😉
Now, let's check the Network tab to see if there are additional resources being loaded:
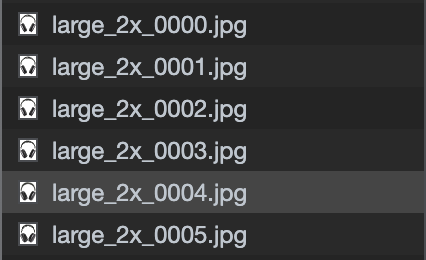
As suspected, there are approximately 45 different images being loaded for the AirPods Max image sequence.
Think of these images as frames of a video. As you scroll, the respective frames render.
To work with these images, let's create the correct URLs to load them using TypeScript:
// We know it has 45 frames and Apple pads their URLs with 3 0's before the index of the frame
let airpodsMax = Array.from({ length: 45 }, (_, i) => i).map((i) => {
  const paddedIndex = i.toString().padStart(4, "0");
  return `https://www.apple.com/105/media/us/airpods-max/2020/996b980b-3131-44f1-af6c-fe72f9b3bfb5/anim/turn/large_2x/large_2x_${paddedIndex}.jpg`;
});
Now that we have our images, let's move on and consider the next steps in our workflow.
Algorithm
Before we begin implementation, let's break down our algorithm into the following steps:
- Load the images before rendering them on the canvas element.
let imageSources: HTMLImageElement[] = [];

function loadImages() {
  imageSources = images.map((src) => {
    const img = new Image();
    img.src = src;
    return img;
  });
}
- Size the canvas accordingly.
function sizeCanvas() {
  const context = canvas.getContext("2d");

  canvas.width = window.outerWidth;
  canvas.height = window.outerHeight;

  context?.clearRect(0, 0, canvas.width, canvas.height);
}
- Render the first frame.
function drawImage(frame: number) {
  const context = canvas.getContext("2d");
  // get image element by frame
  const image = imageSources[frame];
  // calculate image size according to canvas size
  const hRatio = canvas.width / image.width;
  const vRatio = canvas.height / image.height;
  const ratio = Math.min(hRatio, vRatio);
  const centerShiftX = (canvas.width - image.width * ratio) / 2;
  const centerShiftY = (canvas.height - image.height * ratio) / 2;

  requestAnimationFrame(() => {
    context?.drawImage(
      image,
      0,
      0,
      image.width,
      image.height,
      centerShiftX,
      centerShiftY,
      image.width * ratio,
      image.height * ratio
    );
  });
}

// render the first frame
drawImage(0);
Responsiveness
Currently, I'm stretching the image to fit the canvas, but this decision may change based on other requirements.
- Obtain the scroll value of the window.
- Update the rendered frame on the canvas based on the scroll value.
Please note that the specific implementation of some steps depends on the library we are using. Continue reading to see the full details.
Svelte version
For the Svelte version, we can create a component called ImageSequence.svelte with three props.
// The window scroll value capture by the consumer of the component
export let scrollY: number;
// The duration in px of the scroll. Used to orchestrate the frame rendering
export let duration: number;
// The frame URLs array
export let images: string[];
The rendering logic is simple. In this example, I'm making the component the size of one screen (100vh),
and I'm binding the duration prop to match the vh property for easier testing and less time spent on timing orchestration.
<section bind:this={section} style="--duration: {duration || 100}vh;">
	<canvas bind:this={canvas} />
</section>

<style>
	section {
		width: 100%;
		height: var(--duration);
		position: relative;
	}

	section > canvas {
		width: 100%;
		height: 100vh;
		inset: 0;
		position: sticky;
		object-fit: contain;
		pointer-events: none;
	}
</style>
When the component is rendered, we want to execute the functions we defined earlier when discussing the algorithm.
import { onMount } from "svelte";

onMount(() => {
  loadImages();
  sizeCanvas();
  drawImage(0);
});
Now, all that's left is to react (pun intended 😏) to changes in the scroll value.
$: {
  // if the scroll value has reached it's intended target
  if (
    scrollY >= section?.offsetTop &&
    scrollY <= section?.offsetTop + section?.offsetHeight
  ) {
    const scrollTop = scrollY - section.offsetTop;
    const contentHeight = canvas.clientHeight;
    // we calculate the % of scroll progress through the section
    const progress = scrollTop / contentHeight;
    // we clamp the value to prevent overflow and negative values
    const frame = Math.max(
      0,
      Math.min(images.length - 1, Math.floor(progress * images.length))
    );

    // we render the intended frame
    drawImage(frame);
  }
}
React version
For React, the implementation requires a bit more code, but the rendering logic remains identical.
const Example = () => {
  const [scrollY, setScrollY] = useState(0);

  useEffect(() => {
    function handleScroll() {
      setScrollY(window.scrollY);
    }

    window.addEventListener("scroll", handleScroll);

    return () => window.removeEventListener("scroll", handleScroll);
  }, []);

  return <ImageSequence scrollY={scrollY} images={airpodsMax} duration={300} />;
};
The ImageSequence component may have a slightly different structure, but the underlying logic remains the same — it's just the React way of doing it!
const ImageSequence = ({ scrollY, images, duration }: ImageSequenceProps) => {
  const sectionRef = useRef<HTMLElement>(null);
  const canvasRef = useRef<HTMLCanvasElement>(null);
  const imagesRef = useRef<HTMLImageElement[]>([]);

  // on mount
  useEffect(() => {
    if (!canvasRef.current || !sectionRef.current) return;

    imagesRef.current = loadImages(images);
    sizeCanvas(canvasRef.current);
    drawImage(0, imagesRef.current, canvasRef.current);
  }, [images]);

  // on scrollY change
  useEffect(() => {
    if (!canvasRef.current || !sectionRef.current) return;

    const canvas = canvasRef.current;
    const section = sectionRef.current;
    const images = imagesRef.current;

    if (
      scrollY >= section?.offsetTop &&
      scrollY <= section?.offsetTop + section?.offsetHeight
    ) {
      const scrollTop = scrollY - section.offsetTop;
      const contentHeight = canvasRef.current.clientHeight;
      const progress = scrollTop / contentHeight;
      const frame = Math.max(
        0,
        Math.min(images.length - 1, Math.floor(progress * images.length))
      );

      drawImage(frame, images, canvas);
    }
  }, [scrollY]);

  return (
    <section
      ref={sectionRef}
      style={{
        width: "100%",
        height: `${duration || 100}vh`,
        position: "relative",
        backgroundColor: "white",
      }}
    >
      <canvas
        ref={canvasRef}
        style={{
          width: "100%",
          height: "100vh",
          inset: 0,
          position: "sticky",
          objectFit: "cover",
          pointerEvents: "none",
        }}
      />
    </section>
  );
};
Example
To illustrate the implementation, I've created an interactive example here!
The End
And there you have it! 🚀
The end result is a remarkable and creatively executed illusion. While there are additional improvements that would be needed for production, such as loading different images for different breakpoints, precise timing orchestrations, and appropriately sizing the images to meet specific requirements, this implementation was developed in just an afternoon.
I hope you found this article helpful and gained some valuable insights for your own development journey.